When it comes to interior design, small changes can make a significant impact. One such change that can transform your living space is the addition of shutters. Shutters not only provide practical benefits such as privacy and light control but also serve as a stylish and elegant window treatment. While professional installation can be expensive, the DIY route offers a cost-effective and rewarding alternative. In this comprehensive guide, we will explore the world of DIY shutters, including their benefits, different types, installation techniques, maintenance tips, and inspiring case studies.
Benefits of DIY Shutters:
Section 1: Energy Efficiency and Privacy
- Energy Efficiency: DIY shutters can significantly contribute to energy efficiency in your home. By installing shutters, you create an additional layer of insulation, which helps to regulate indoor temperatures. During the winter, shutters provide insulation against cold drafts, reducing heat loss and lowering heating costs. In the summer, they block out direct sunlight and heat, reducing the reliance on air conditioning and saving on cooling expenses. This energy efficiency can lead to cost savings and a reduced environmental impact.
- Privacy: DIY shutters offer an excellent solution for enhancing privacy in your home. With adjustable louvers, you have control over the level of privacy without compromising natural light. By tilting the louvers, you can obscure the view from the outside while still allowing soft light to filter through, creating a comfortable and private living environment.
Section 2: Customization and Design Options
- Customization: DIY shutters provide a range of customization options to match your style and preferences. Choose from different materials, such as wood, faux wood, vinyl, or composite, each with its own characteristics and aesthetic appeal. You can also customize the color, finish, and louver width to create a personalized look that complements your interior design.
- Design Versatility: DIY shutters are versatile and can adapt to various design styles. Whether your home has a traditional, contemporary, or eclectic aesthetic, there are shutter options that can enhance the overall look. From plantation shutters with wide louvers to café shutters that cover the lower portion of the window, you can find a style that suits your taste and complements your existing decor.
Section 3: Noise Reduction and Durability
- Noise Reduction: In addition to enhancing privacy, DIY shutters can help reduce outside noise infiltration. The solid construction and insulation properties of shutters effectively block and absorb sound waves, minimizing disturbances from street noise, neighbors, or other external sources. This creates a quieter and more peaceful indoor environment, particularly for homes located in busy or noisy areas.
- Durability and Longevity: DIY shutters, when properly installed and maintained, can be a durable window treatment option. High-quality materials like wood, faux wood, or vinyl offer durability and resistance to wear and tear. Regular maintenance, including cleaning and occasional repainting or re-staining, can help preserve the shutters’ aesthetic appeal and functionality for many years.

Section 4: Additional Benefits and UV Protection
- Light Control: DIY shutters allow for precise control over natural light entering your space. Adjusting the position of the louvers allows you to modulate the amount of light, creating the desired ambiance and reducing glare.
- UV Protection: Shutters offer protection against harmful ultraviolet (UV) rays from the sun. The adjustable louvers can be angled to block direct sunlight, helping to prevent fading and damage to furniture, flooring, and other interior elements.
Types of DIY Shutters:
- Plantation Shutters: Plantation shutters feature wide louvers that allow maximum control over light and privacy. These shutters are versatile and suitable for various architectural styles, from traditional to contemporary. Plantation shutters often come in natural wood or faux wood materials, offering durability and a timeless aesthetic.
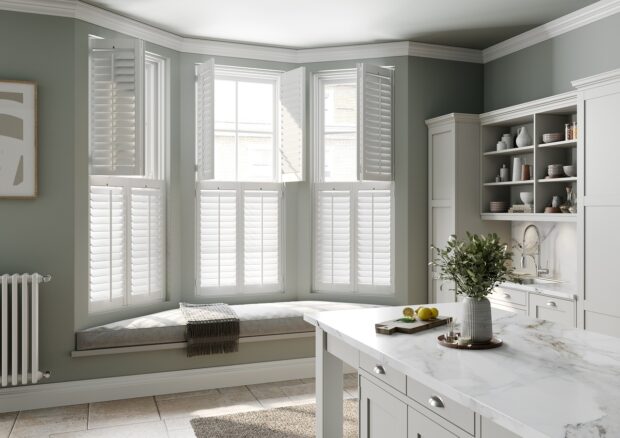
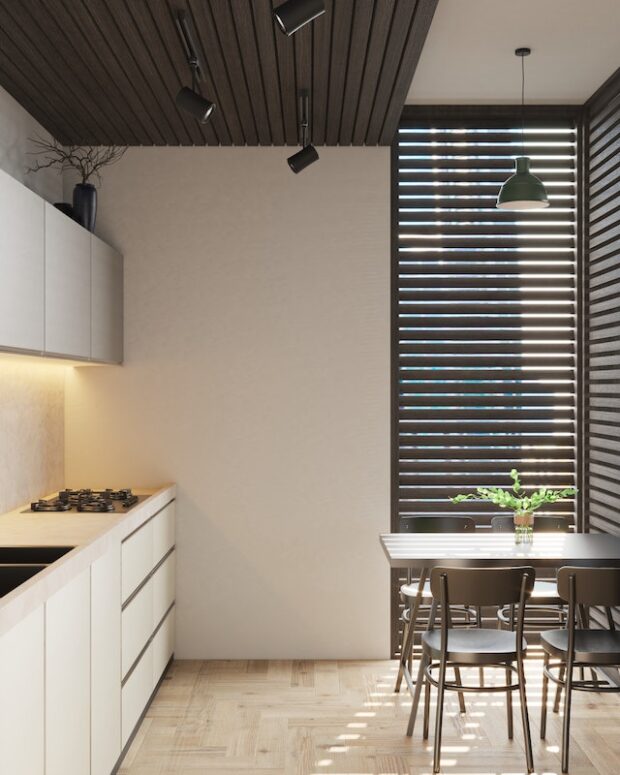
- Cafe Shutters: Cafe shutters cover only the lower portion of a window, providing privacy while still allowing natural light to flood in through the upper portion. This style is popular in kitchens, dining areas, and cafes, adding a touch of charm and European elegance to the space.
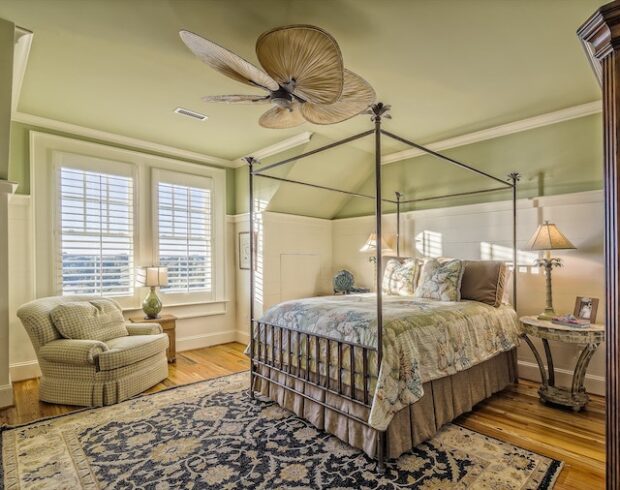
- Full-Height Shutters: Full-height shutters cover the entire window from top to bottom, offering complete privacy and light control. They are a popular choice for bedrooms, living rooms, and areas where maximum privacy is desired.
- Tier-on-Tier Shutters: Tier-on-tier shutters consist of two sets of shutters, one on top of the other, which can be operated independently. This style provides the flexibility to open the top shutters while keeping the bottom shutters closed, allowing for customized light control and privacy options.
Choosing the Right Material for DIY Shutters:
When selecting the material for your DIY shutters, there are a few options to consider:
- Wood Shutters: Wood shutters offer a timeless and classic look. They are available in various types of wood, such as oak, maple, or basswood, each with its unique grain patterns and characteristics. Wood shutters can be stained or painted to match your decor. They provide excellent insulation properties and durability, making them a popular choice for DIY projects.
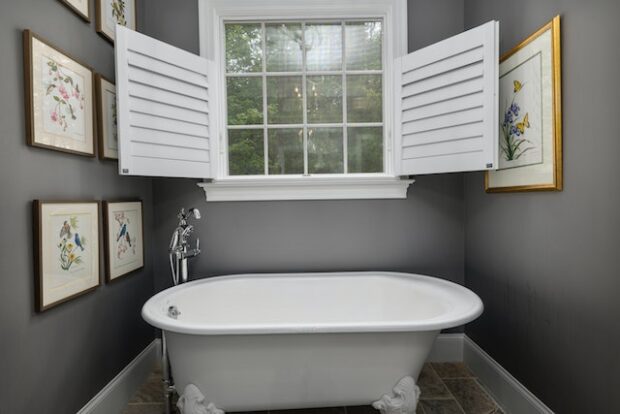
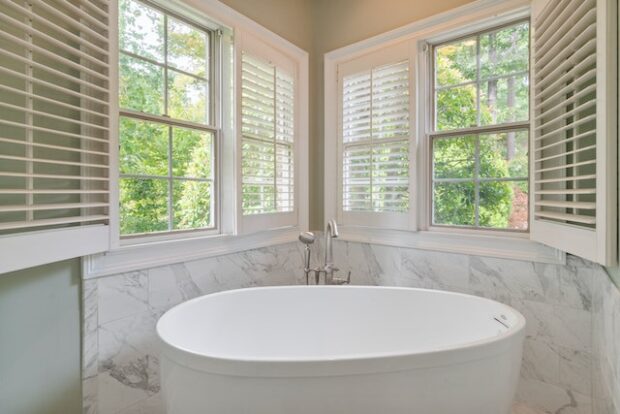
- Faux Wood Shutters: Faux wood shutters are crafted from synthetic materials that mimic the appearance of real wood. They are more affordable than genuine wood shutters and offer increased resistance to moisture, making them suitable for areas with high humidity, such as bathrooms or kitchens. Faux wood shutters are easy to clean and maintain, making them a practical choice for DIY installations.
- Vinyl Shutters: Vinyl shutters are lightweight, affordable, and resistant to moisture and humidity. They are an excellent option for areas prone to moisture exposure, such as bathrooms or laundry rooms. Vinyl shutters are available in various colors and finishes, allowing you to achieve different aesthetic styles.
- Composite Shutters: Composite shutters are a combination of wood particles and synthetic materials. They offer the look and feel of real wood while providing enhanced durability and resistance to moisture. Composite shutters are available in different styles and finishes, allowing you to customize them to your desired look.
Remember to consider factors such as your budget, style preferences, and the specific requirements of the room when choosing the material for your DIY shutters. Each material has its unique benefits, so weigh the pros and cons to make an informed decision.
Additional Benefits of DIY Shutters:
- Increased Home Value: Installing DIY shutters can enhance the overall value of your home. Potential buyers often appreciate the timeless elegance and practicality of shutters, which can make your property more appealing when it comes time to sell.
- Versatility in Design: DIY shutters come in various styles, colors, and finishes, allowing you to tailor them to your specific design preferences. Whether you’re aiming for a traditional, contemporary, or eclectic look, shutters offer versatility in complementing your existing decor.
- Privacy and Security: In addition to providing privacy from prying eyes, shutters also act as a deterrent against break-ins. Their sturdy construction and ability to completely cover the window make it difficult for intruders to gain access to your home.
- UV Protection: Shutters can help protect your furniture, flooring, and decor from harmful UV rays. By adjusting the louvers, you can filter the amount of sunlight entering the room, preventing fading and damage to your belongings.

By considering these additional benefits and exploring the various materials available, you can make an informed decision about the type of DIY shutters that will best suit your needs and preferences.
DIY Shutter Installation:
Before embarking on your DIY shutter installation project, it’s crucial to gather the necessary tools and materials. These typically include a measuring tape, screwdriver, level, drill, brackets, and the shutters themselves. It’s essential to follow the manufacturer’s instructions for the specific product you’ve chosen, but here are some general steps to guide you:
- Measure Your Windows: Accurate measurements are crucial for a seamless installation. Measure the width and height of each window, ensuring that you account for any obstructions such as window handles or latches. It’s advisable to measure twice to avoid errors.
- Order or Purchase DIY Shutters: Once you have the measurements, you can order or purchase the DIY shutters. Consider the material, color, and style that best complement your existing decor. Many retailers offer customizable options to ensure the shutters fit your windows perfectly.
- Prepare the Area: Before installation, clear the window area of any obstructions and remove existing window treatments. Clean the window frames and surrounding surfaces to provide a clean and smooth base for the shutters.
- Install Mounting Brackets: Following the manufacturer’s instructions, install the mounting brackets onto the window frame or wall. Use a level to ensure the brackets are straight and aligned correctly. Secure the brackets with screws, ensuring they are firmly in place.
- Attach the Shutter Panels: Place the shutter panels onto the mounting brackets. Depending on the type of shutters, they may slide into the brackets or attach with screws. Double-check that the shutters are level and properly aligned. For multiple-panel shutters, ensure the panels are evenly spaced.
- Adjust Louvers and Test Functionality: Once the shutter panels are securely attached, adjust the louvers to your desired angle. Test the functionality of the shutters by opening and closing them to ensure smooth operation. Make any necessary adjustments or tightening of screws if needed.
- Final Touches: Inspect the installed shutters for any gaps or misalignments. Make any necessary adjustments to ensure a seamless and professional finish. Clean the shutters and surrounding areas, removing any dust or debris from the installation process.

Section 5: Installation Tips and Real-Life Case Study
Installation Tips:
When it comes to installing DIY shutters, following a systematic approach is key. Here are some essential tips to ensure a successful installation:
- Measure accurately: Take precise measurements of your windows to ensure a proper fit. Measure the width, height, and depth of the window frame, considering any obstructions such as handles or locks. Double-check your measurements before proceeding.
- Choose the right tools: Gather the necessary tools for installation, including a tape measure, drill, screwdriver, level, and screws. Ensure that you have the appropriate screws and anchors for the type of wall or window frame you are working with.
- Prepare the shutter panels: Assemble the shutter panels according to the manufacturer’s instructions. This may involve attaching louvers, hinges, and other hardware. Take your time to ensure proper alignment and stability.
- Mount the frame: Begin by installing the frame or mounting strips around the window opening. Use a level to ensure that the frame is perfectly straight. Secure the frame in place with screws or other fasteners, following the manufacturer’s guidelines.
- Attach the shutter panels: Once the frame is securely mounted, attach the shutter panels one by one, making sure they align properly and open and close smoothly. Adjust the tension screws if necessary to achieve the desired louver movement.
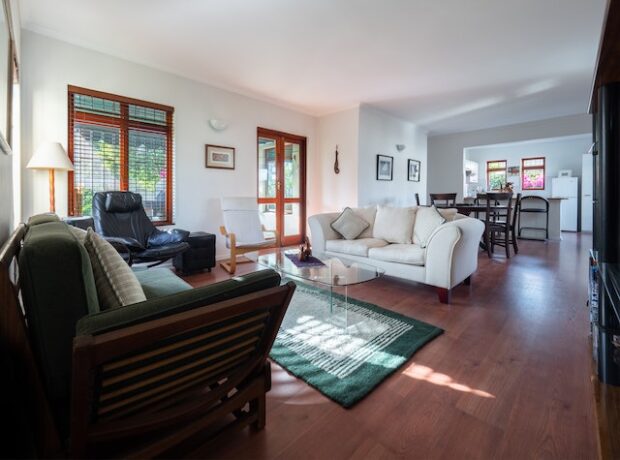
Real-Life Case Study: The Thompson Family’s Living Room Transformation
Meet the Thompson family from Pleasantville. They were looking to revamp their living room and add a touch of elegance and functionality to their space. After considering various options, they decided to install DIY shutters as their window treatment of choice.
The Thompsons selected a set of white faux wood shutters that perfectly complemented their living room decor. The wide louvers allowed for optimal light control, giving them the flexibility to adjust the amount of sunlight entering the room.
Following the installation tips and armed with the necessary tools, Mr. Thompson embarked on the installation process over a weekend. He carefully measured the windows, ensuring an accurate fit for each shutter panel. With the help of his wife, they assembled the shutter panels, attaching the hinges and louvers according to the manufacturer’s instructions.
Once the frame was securely mounted, they attached the shutter panels one by one, ensuring smooth movement and alignment. The result was breathtaking! The DIY shutters instantly added a touch of sophistication to their living room, transforming it into a cozy and inviting space.
The Thompson family now enjoys the benefits of their DIY shutters, including enhanced privacy, light control, and improved insulation. They have also noticed a reduction in outside noise, creating a tranquil environment for relaxation and family gatherings.
The installation process was a rewarding experience for the Thompsons. Not only did they save on installation costs, but they also gained a sense of accomplishment from completing the project themselves.
This real-life case study of the Thompson family exemplifies how DIY shutters can truly transform a living space, offering both functional and aesthetic benefits. Whether you’re considering a similar project or seeking inspiration, their story serves as a testament to the possibilities that DIY shutters can bring to your home.
Maintenance Tips for DIY Shutters:
- Regular Cleaning: Keep your DIY shutters looking their best by regularly dusting them with a soft cloth or using a vacuum cleaner with a brush attachment. For tougher stains, gently wipe the shutters with a damp cloth or use a mild cleaning solution recommended by the manufacturer.
- Lubricate Moving Parts: If your shutters have hinges or other moving parts, apply a silicone-based lubricant to keep them functioning smoothly. This prevents squeaking and ensures ease of operation.
- Check for Loose Screws: Periodically inspect the shutter panels and mounting brackets for any loose screws. Tighten them as necessary to maintain the stability of the installation.
- Protect Against Moisture: If your shutters are in areas prone to high humidity, such as bathrooms or kitchens, consider using moisture-resistant materials or applying a protective sealant. This helps prevent warping or damage caused by moisture exposure.
Case Studies: Inspiring DIY Shutter Transformations
- Rustic Elegance: Sarah, a DIY enthusiast, wanted to add a touch of rustic charm to her farmhouse-style kitchen. She opted for white plantation shutters with a distressed wood finish. The shutters complemented the natural wood elements in the room and provided a clean, classic look while allowing ample natural light to flow in.
- Contemporary Chic: Mark and Lisa were renovating their urban loft and wanted a window treatment that combined functionality with modern aesthetics. They chose sleek black full-height shutters for their floor-to-ceiling windows. The shutters added a touch of sophistication and provided excellent light control, creating a cozy and stylish living space.
- Bohemian Bliss: Emma, an artist, desired a bohemian-inspired studio with abundant natural light. She installed tier-on-tier shutters painted in vibrant colors, allowing her to customize the amount of light and privacy as she worked. The shutters acted as a backdrop for her artwork, creating a vibrant and inspiring environment.
- Cozy Cafe Vibe: Tom and Anna wanted to create a cozy cafe atmosphere in their breakfast nook. They installed cafe shutters painted in soft pastel shades, which added a European flair to the space. The shutters allowed the morning sunlight to gently filter through, creating an inviting and intimate setting for their daily coffee rituals.

Conclusion:
DIY shutters offer an exciting opportunity to transform your living space with elegance and style. By embracing the benefits of DIY shutters, such as enhanced privacy, light control, energy efficiency, and noise reduction, you can create a comfortable and visually appealing environment in your home.
When considering DIY shutters, explore the various types available, such as plantation shutters, cafe shutters, full-height shutters, and tier-on-tier shutters. Each style offers unique features and can be tailored to suit your specific needs and design preferences.
Installing DIY shutters requires careful measurements, proper tools, and following the manufacturer’s instructions. By taking your time and ensuring precise installation, you can achieve professional-looking results that elevate the aesthetic of your space.
To keep your shutters in optimal condition, regular maintenance is essential. Dusting, cleaning, and lubricating moving parts will help prolong the lifespan of your shutters and keep them looking their best for years to come.
Through inspiring case studies, we’ve seen how DIY shutters can completely transform various spaces, whether you’re aiming for rustic elegance, contemporary chic, bohemian bliss, or a cozy cafe vibe. With a wide range of customization options available, you can personalize your shutters to reflect your unique style and create a space that truly feels like home.
So, if you’re ready to embark on a DIY shutter project, take the time to research different styles, materials, and installation techniques. Plan and prepare for the task at hand, ensuring you have the necessary tools and materials. By embracing the world of DIY shutters, you can enhance your living space, add value to your home, and enjoy the satisfaction of a project well done.